Choosing outdoor lighting is rarely as simple as buying the brightest fixture. The real challenge is understanding how to choose the right lumens for outdoor lighting without creating glare, dark corners, or unnecessary energy use. A welcoming front path may need gentle, evenly spread light. A driveway may require stronger output and wider coverage. A small patio can feel uncomfortable when one powerful lamp shines directly into people’s eyes.
Howard Brandston, a respected lighting designer and educator, wrote, “The purpose of lighting is to make things visible.” That principle remains useful, but visibility is not the only goal outdoors. Safety, comfort, beam angle, mounting height, surface color, and nearby light sources all influence the result. Lumens describe total light output, not how well that light reaches a particular step or doorway. This difference often surprises homeowners.
There is no perfect lumen number for every garden or building. Weather, foliage, wall finishes, and personal vision can change the experience. A fixture that looks adequate in a showroom may appear weak beside a dark fence. Another may make a narrow walkway harsh and overexposed. This guide explores seven practical tips for selecting suitable lumens, comparing fixture types, testing placement, and avoiding common mistakes. It also encourages a modest approach: begin with less light, observe the space after sunset, and adjust carefully. More brightness is not always better. Sometimes, it simply hides poor planning.
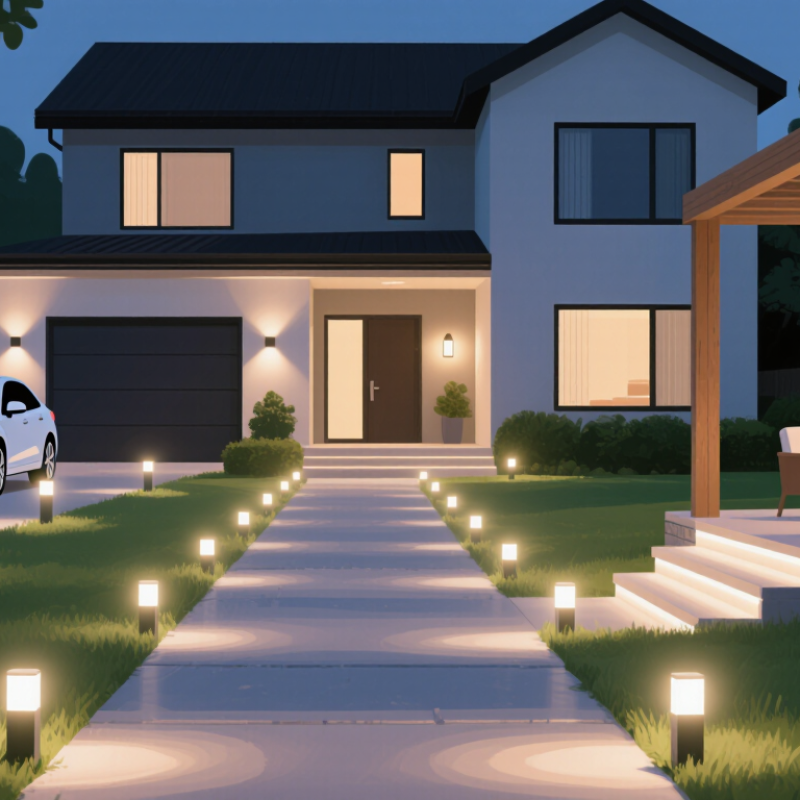
Lumens measure the total amount of visible light produced by a lamp. They do not measure electricity use or brightness at one specific point. A higher lumen rating usually means more light, but placement changes the result. A 1,000-lumen fixture may illuminate a small path well, while a wide driveway may still look dim.
Start by matching lumens to the outdoor task. Path lighting often needs modest output to reveal edges and steps. Entrances and work areas usually require stronger illumination. Large walls, patios, and driveways may need several fixtures instead of one powerful source. Check the beam angle, mounting height, and distance from the target. A narrow beam can create bright spots and dark gaps. Light-colored surfaces reflect more light than rough, dark surfaces.
My first outdoor lighting plan used too many lumens near a doorway. The entrance felt harsh, and nearby windows received unwanted glare. Lower output, better aiming, and shielded fixtures worked more effectively. That experience showed me that comfort matters as much as visibility. Compare the stated lumens with real conditions, including rain, foliage, shadows, and seasonal changes. Clean lenses periodically, because dirt reduces useful light. Do not judge performance by numbers alone. Sometimes, less light works better.
Outdoor lighting succeeds when lumens follow activity, not guesswork. A quiet garden path may need 100–300 lumens per fixture. A front entrance often works better with 300–800 lumens. Driveways and wide patios may require 700–1,500 lumens, depending on fixture spacing and beam angle. These are practical starting points, not universal standards. The Illuminating Engineering Society stresses that visual comfort depends on illuminance, distribution, glare control, and surface reflectance—not lumens alone.
Tip 1: Identify the task. Use lower output for ambience and higher output for steps, locks, and vehicle areas. Tip 2: Check the mounting height. A light mounted higher spreads farther, but loses intensity at ground level. Tip 3: Consider beam width. Narrow optics concentrate light, while wide optics cover pathways more evenly. The U.S. Department of Energy reports that modern LEDs can deliver roughly 80–150 lumens per watt, so efficiency should accompany brightness.
Tip 4: Avoid choosing the brightest fixture automatically. Excess light can create glare and harsh shadows. Tip 5: Use warmer color temperatures near seating areas and bedrooms. Tip 6: Layer lighting around entrances, paths, and landscaping instead of relying on one powerful source. Tip 7: Test at night before final installation. I still find paper estimates misleading sometimes. Dark surfaces absorb light, while pale walls reflect it strongly. ENERGY STAR and DOE data also indicate LEDs can use at least 75% less energy than incandescent lighting, supporting careful lumen selection rather than excessive output.
Match lumens to the purpose of each outdoor area
Recommended brightness varies by task and area size. Pathways usually need modest illumination for safe navigation, while entrances, driveways, patios, and security zones require progressively higher lumen output. Use multiple fixtures and adjustable controls when a large area needs even coverage.
Choosing the right lumens begins with the space, not the fixture. Measure the area in square metres, then choose a target brightness. Paths often need about 10–30 lux, while outdoor work areas may need 100–200 lux. A simple estimate is: required lumens = lux × area For a 20-square-metre patio needing 50 lux, start near 1,000 useful lumens.
That number is only a starting point. Light loses strength when fixtures are mounted high, spaced too far apart, or aimed across dark surfaces. Wide beams cover more ground but may create softer, less concentrated lighting. Narrow beams can highlight steps, trees, or entrances, though they may leave gaps between fixtures. Check the photometric information, not only the advertised lumen rating.
Tips: Sketch the space before buying. Mark doors, steps, seating, and obstacles. Place lights near walking edges, then calculate overlapping coverage. Avoid pointing every fixture directly at eye level; glare quickly makes a comfortable patio unpleasant. Use slightly lower output near reflective walls and brighter output near dark stone or dense planting.
My first outdoor layout used too many high-lumen fixtures. It looked secure, but the shadows felt harsh and the seating area became uncomfortable. I would now test one fixture at night before installing several. Weather, dirt, aging, and nearby lighting also reduce practical brightness. Leave room for adjustment with dimming or adjustable mounting. A little restraint helps.
Tip 1: Match lumens to the task, not the largest area. A pathway often needs gentle, even light rather than intense brightness. In my experience, 100 to 300 lumens per fixture can guide steps safely. Several low-output fixtures usually feel better than one harsh spotlight. Check the surface, spacing, and surrounding darkness before deciding.
Tip 2: Protect comfort by controlling glare. Aim fixtures downward and keep them away from direct eye level. A bright beam across a bedroom window quickly becomes irritating. My first outdoor setup was too bright, and the space felt exposed instead of welcoming. Dimming controls help adjust brightness after installation, especially during quiet evening hours.
Tip 3: Reduce light pollution with careful placement. Use only the lumens you need, and avoid lighting empty spaces all night. Warm-colored light often feels softer and limits the sharp appearance of blue-rich illumination. Shielded fixtures can keep light on paths, entrances, and steps. They also reduce spill toward neighbors and nearby trees.
Walk around the property after dark. Observe shadows, reflections, and uncomfortable bright spots. Rainy pavement can reflect more light than expected, so test the system in different weather. Local outdoor-lighting rules may also affect acceptable brightness, mounting height, and operating times. Safety matters, but darkness has value too.
Outdoor lighting needs more than a high lumen number. Lumens measure total light, not how well it reaches a path, wall, or seating area. Start by matching output to the task and surface. A small step path may need modest output. A broad driveway needs more, especially under trees or uneven paving. In practice, testing one fixture at dusk reveals shadows that product tables cannot show. Keep spare adjustment room.
Beam angle controls concentration. Narrow beams create bright accents on trees or signs. Wide beams spread light across patios and walkways. A medium beam often works better for mixed spaces. Avoid aiming high-output fixtures at windows or neighboring homes. It creates glare, wastes energy, and reduces visual comfort. Color also matters. Warm white light, around 2700–3000K, usually suits residential areas. Cooler light can improve detail, but it may feel harsh.
Check photometric files, not only advertised lumens. Look for delivered lumens, beam distribution, color rendering, and rated life. High CRI helps reveal natural plant and paving colors. Outdoor fixtures also need an appropriate IP rating for rain and dust. For larger sites, a qualified lighting professional can verify spacing and glare control. A dimmer or timer can prevent over-lighting. Even careful estimates can miss seasonal foliage changes. Recheck the installation after rain, pruning, and nighttime use.
A practical reference for selecting outdoor lighting output, beam spread, color temperature, efficiency, and weather protection.
| Tip | Outdoor Lighting Application | Typical Lumens per Fixture | Recommended Beam Angle | Suitable Color Temperature | Efficiency and Control Guidance | Key Selection Consideration |
|---|---|---|---|---|---|---|
| 1 | Pathways and Garden Walkways | 100–300 lm | 60°–120° for broad, low-level coverage | 2700–3000 K for a warm and comfortable appearance | Choose efficient LED fixtures with at least 80 lm/W; timers or photocells can reduce unnecessary operation. | Use several low-output fixtures rather than a few overly bright units to reduce glare and dark gaps. |
| 2 | Porches, Steps, and Entry Areas | 300–800 lm | 60°–100° for wall-mounted or ceiling-mounted coverage | 2700–3500 K for welcoming illumination with useful visibility | Motion sensors or adaptive dimming are suitable where lights are not needed continuously. | Prioritize uniform light on steps and door hardware; avoid placing a high-output source directly at eye level. |
| 3 | Patios, Decks, and Outdoor Seating | 500–1500 lm per area fixture | 90°–120° for ambient lighting; 30°–60° for focused task areas | 2700–3000 K for relaxed social spaces | Dimming is valuable for changing activity levels; select fixtures with good glare control and a color rendering index of 80 or higher. | Layer ceiling, wall, and accent lighting instead of relying on one intense fixture. |
| 4 | Driveways and Small Parking Areas | 1000–3000 lm per fixture | 90°–150° for broad distribution; 30°–60° for longer throw | 3000–4000 K for clearer visibility without an overly harsh appearance | Photocells, timers, and motion controls can limit operating hours; aim for at least 90 lm/W when practical. | Check mounting height and spacing before increasing lumens. Excess output can create glare and reduce visual comfort. |
| 5 | Security and Floodlighting | 1500–4000 lm per fixture | 30°–90° depending on distance and target area | 3000–4000 K for balanced recognition and reduced harshness | Use motion activation, adjustable output, and shielding; avoid aiming light toward neighboring properties or road users. | Higher lumens are not always better. Correct aiming, overlap, and uniformity are more important than maximum brightness. |
| 6 | Trees, Facades, and Landscape Accents | 150–1000 lm per accent fixture | 10°–30° for narrow highlighting; 30°–60° for broader wall washing | 2700–3000 K for warm landscape emphasis | Use low-wattage LED fixtures with adjustable heads and glare shields; dimming helps protect the nighttime environment. | Match beam width to the object: narrow beams suit trunks and architectural details, while wider beams suit walls and shrubs. |
| 7 | Wet or Exposed Outdoor Locations | Application-dependent: typically 300–3000 lm | Select according to the target area, not only fixture brightness | 2700–4000 K depending on ambience, visibility, and surrounding lighting | Use fixtures with an appropriate IP rating: IP44 for sheltered splash exposure, IP65 for dust-tight and water-jet protection, and higher protection where specified by the installation conditions. | Confirm the fixture is rated for the actual exposure, temperature range, mounting position, and local electrical requirements. |
Planning note: Actual lumen requirements vary with mounting height, surface reflectance, fixture spacing, optics, local ambient light, and desired illuminance. Use these ranges as starting points and verify the final layout for glare, uniformity, and light spill.
Start with 100–300 lumens per fixture. Gentle, even light usually guides steps better than one harsh spotlight.
An entrance often works with 300–800 lumens. Keep the beam below eye level, especially near locks and windows.
A driveway or broad patio may need 700–1,500 lumens. Spacing, trees, paving, and beam angle can change the result.
No. Excess brightness creates glare and sharp shadows. My first setup was too bright and felt exposed, not welcoming.
Higher mounting spreads light farther but reduces ground-level intensity. Walk around after dark before fixing the final position.
Narrow beams create focused accents on trees or signs. Wide beams cover paths and patios more evenly. Medium beams suit mixed areas.
Warm white light around 2700–3000K often feels softer near seating and bedrooms. Cooler light can show detail but may feel harsh.
Aim fixtures downward and use shields. Light only paths, steps, and entrances. Avoid leaving empty areas brightly lit all night.
Test one fixture at dusk. Check shadows, reflections, windows, and nearby trees. Rainy pavement may reflect more light than expected.
Check delivered lumens, beam distribution, color rendering, rated life, and outdoor protection. A dimmer or timer provides useful adjustment room.
Choosing the right brightness is essential for creating safe, comfortable, and efficient outdoor spaces. Lumens measure the total amount of visible light produced by a fixture, so they are more useful than wattage when comparing brightness. To understand how to choose the right lumens for outdoor lighting, first consider the purpose of each area. Pathways and steps usually need moderate illumination for visibility, while entrances, work areas, and security zones may require stronger light. Decorative garden features often benefit from softer brightness that enhances the surroundings without overwhelming them.
The size and layout of the space also affect lumen requirements. Larger areas may need multiple fixtures rather than one extremely bright light, and placement should be planned to minimize dark spots and glare. Adjust brightness according to safety needs, visual comfort, and the risk of unnecessary light pollution. Efficient fixtures with suitable beam angles can direct light where it is needed, while warm or neutral color options can create a more natural and inviting outdoor atmosphere.
