What Is Solar Flood Light Installation on Concrete Walls?

Time:2026-10-13 Author:Mason
0%

Solar flood lights can brighten a dark driveway, garden path, or entrance without connecting to household wiring. When mounted on a concrete wall, they offer practical security lighting and flexible placement. However, concrete is not as forgiving as timber or brick. A poor hole location can crack the surface, loosen the fixture, or damage hidden cables and pipes.

This guide explains how to install solar flood lights on a concrete wall using careful planning and suitable hardware. You will learn how to assess sunlight, mark mounting points, drill safely, insert wall anchors, and adjust the panel and light angle. A sunny wall usually gives the battery better charging performance, while a shaded corner may reduce operating time. Small details matter, too. Keep the panel clear of roof shadows. Seal exposed openings when weather requires it. Use stainless-steel screws where moisture is common.

In practical installations, a masonry drill bit and a hammer drill usually provide cleaner results than ordinary tools. Wear eye protection, especially when drilling overhead. Check the wall condition before applying pressure. Old concrete can be uneven, weak, or unexpectedly brittle. Measure twice.

The process sounds simple, but it is not completely foolproof. Solar performance changes with seasons, dust, temperature, and nearby trees. Even a correctly installed light may need occasional cleaning or repositioning. A reliable installation balances brightness, structural safety, weather resistance, and realistic maintenance expectations.
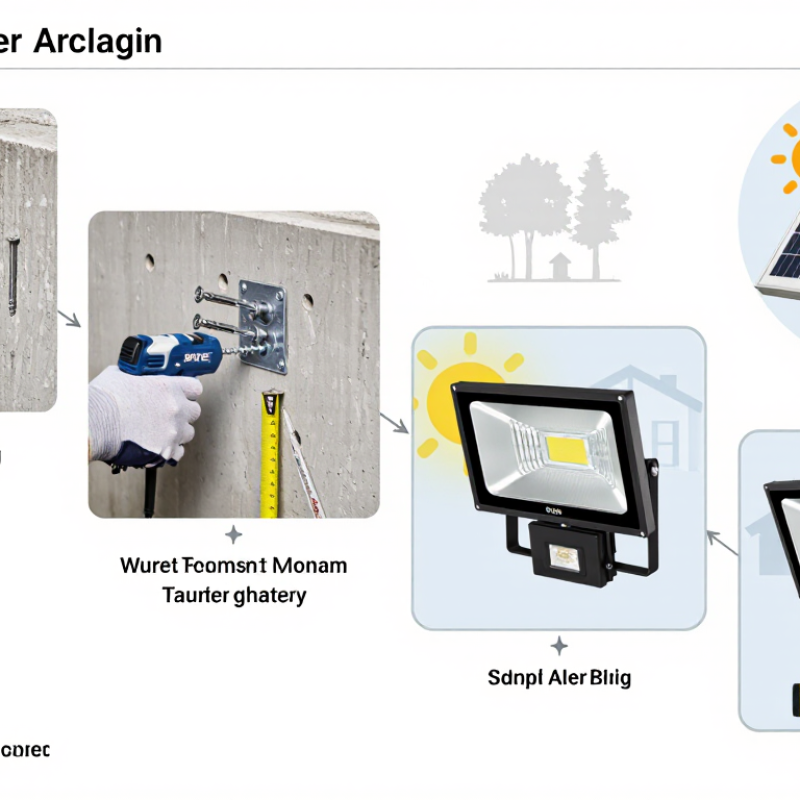
What Is Solar Flood Light Installation on Concrete Walls?

What Is Solar Flood Light Installation on Concrete Walls?

Solar flood light installation on concrete walls means mounting a solar-powered outdoor light securely onto masonry. The system usually includes a floodlight, photovoltaic panel, battery, motion sensor, and connecting cable. Unlike a wired fixture, it stores sunlight during the day and releases electricity after dark. The wall must receive strong daylight, while the light should cover entrances, driveways, or narrow paths without shining into nearby windows.

A practical installation begins with checking the concrete for cracks, loose render, or hidden pipes. Mark the mounting holes carefully. Masonry anchors and corrosion-resistant screws provide better support than general-purpose fasteners. A hammer drill can create clean holes, but excessive pressure may damage brittle concrete. Keep the solar panel angled toward the strongest available sunlight. Leave enough cable length for movement, but avoid sharp bends and hanging loops. Seal exposed entry points against rain.

The first layout is rarely perfect. Shadows from balconies, trees, or roof edges can reduce charging more than expected. I would test the light for several nights before tightening every adjustment. The motion sensor may also need patience; pets, passing cars, and warm walls can trigger it unexpectedly. Check the manufacturer’s electrical rating and local installation rules. If the wall is unusually high or unstable, a qualified installer should assess the fixing points rather than guessing.

How Solar Flood Lights Work on Concrete Wall Surfaces

Solar Flood Light Installation on Concrete Walls: How Solar Flood Lights Work on Concrete Wall Surfaces

A solar flood light converts sunlight into electricity through its photovoltaic panel. The panel charges an internal battery during daylight, even when the light itself remains off. At dusk, a light sensor activates the LED flood lamp. Concrete does not produce power. It only provides the mounting surface.

According to IRENA’s Renewable Capacity Statistics 2024, global solar capacity reached about 1,419 GW by the end of 2023. This growth supports wider use of small off-grid lighting systems. However, wall performance still depends on daily sunlight. A south-facing or unobstructed panel usually receives better exposure than one beneath balconies or trees. Shadows matter.

Installation requires careful concrete preparation. The installer should check wall condition, locate hidden utilities, and select anchors suitable for masonry. Dust must be removed before tightening hardware. A slightly downward lamp angle can reduce glare and improve ground coverage. The panel may need a separate bracket for better sunlight. Keep cable openings sealed against rain.

In field work, small details often decide reliability. A loose anchor can slowly enlarge its hole. A poorly placed panel can leave the battery undercharged. This is where practice gets messy. The U.S. Department of Energy reports that LED lighting uses at least 75% less energy than incandescent lighting, but solar units still need realistic expectations. Winter clouds, dirt, and aging batteries can reduce nighttime runtime. Check them regularly.

What Is Solar Flood Light Installation on Concrete Walls? - How Solar Flood Lights Work on Concrete Wall Surfaces

Data dimension Typical or recommended value How it applies to a concrete wall Practical note
Operating principle Solar panel charges a battery during daylight; the stored energy powers LED flood lighting after dark. The concrete surface acts as the mounting structure and does not provide electrical power. A separate solar panel may be mounted on a sunnier area if the wall is shaded.
Suitable wall condition Sound, solid concrete with no major cracks, loose sections, or water damage. Solid concrete generally provides a stable base for anchors when the correct drill bit and fasteners are used. Avoid drilling into visibly deteriorated concrete or unsupported edges.
Common mounting hardware Concrete screws, expansion anchors, or sleeve anchors selected for the fixture load. Fasteners grip the drilled hole in the concrete and secure the light bracket or panel frame. Hardware should be corrosion-resistant for exposed outdoor installations.
Pilot-hole diameter Must match the anchor or concrete screw manufacturer’s specification. An oversized or undersized hole can reduce anchor holding strength. Use a masonry bit; remove drilling dust before inserting an anchor.
Solar-panel orientation Face the panel toward the portion of the sky receiving the most direct sunlight at the site. A wall facing away from strong sunlight may require a separate panel bracket or remote panel position. The best direction depends on location, season, shading, and local roof or wall geometry.
Recommended daily sunlight Several hours of unobstructed direct sunlight are generally needed for reliable daily charging. Nearby buildings, overhangs, trees, and wall recesses can reduce charging energy. Performance commonly decreases after cloudy or rainy periods.
Lighting source LED flood-light module. LEDs provide directional illumination while using relatively little stored energy. Actual brightness depends on LED power, optics, battery state, and operating mode.
Activation method Light sensor, motion sensor, timer, or a combination of these controls. The concrete wall has no effect on sensing unless it blocks the sensor’s field of view. Avoid positioning the motion sensor directly behind wall projections or other obstructions.
Mounting height Choose a height that covers the target area while allowing safe access for maintenance. Higher mounting can broaden coverage but may make battery replacement and cleaning more difficult. Follow the product’s beam angle, sensor range, and installation instructions.
Weather protection Use an outdoor-rated light and seal penetrations where water could enter the wall or mounting point. Concrete is porous, so unsealed holes may permit moisture migration or staining. Do not cover drainage paths or compromise existing waterproofing systems.
Cable routing for split systems Route the low-voltage cable neatly along the wall and protect it from abrasion and sharp bends. Cable clips, conduit, or surface raceway can keep the cable secure on concrete. Keep connectors elevated or protected from standing water.
Light distribution Wide-beam flood lighting covers a broad area; narrow-beam optics produce a more concentrated pattern. Wall height, mounting angle, and nearby surfaces influence glare and shadowing. Aim the fixture only at the required area to reduce glare and wasted light.
Concrete drilling risks Possible damage to concealed reinforcement, utilities, waterproofing, or structural elements. Drilling location matters more than the concrete surface alone. Check for hidden electrical, plumbing, and structural components before drilling.
Maintenance interval Inspect periodically and clean the solar panel when dust, dirt, or bird deposits accumulate. Concrete dust and nearby masonry work can reduce panel light transmission. Check brackets, seals, cable protection, and battery condition during inspection.
Main performance limitations Insufficient sunlight, limited battery capacity, cold or hot conditions, dirt, and sensor settings. Concrete itself normally does not prevent operation, but wall orientation and shading can limit solar charging. Size the lighting duration and brightness expectations according to the available solar resource.

Tools and Materials Needed for the Installation

Installing a solar flood light on a concrete wall requires more than a drill and a sunny location. IRENA reported that global solar capacity reached about 1,419 GW by the end of 2023, showing how quickly solar equipment is entering ordinary buildings. For a secure installation, prepare a tape measure, pencil, spirit level, hammer drill, masonry bits, socket wrench, torque wrench, and safety glasses. A dust mask is useful when drilling concrete.

The material list should include a corrosion-resistant mounting bracket, concrete anchors, stainless-steel screws, flat washers, cable clips, and outdoor-rated sealant. Select anchors that match the wall thickness and the light’s weight. Plastic plugs may loosen in cracked or damp concrete. Keep the panel clear of roof edges, trees, and evening shadows. A level helps prevent uneven lighting. Small misalignment matters.

NREL research has reported median photovoltaic degradation near 0.5% per year, so clean positioning supports long-term performance. Before drilling, inspect the wall for cracks, hidden conduits, and water paths. Mark two anchor points, drill slowly, and remove dust from each hole before inserting anchors. Tighten the screws firmly, but avoid crushing the bracket. I still recheck the angle after tightening; concrete dust can make a careful measurement misleading. Seal around penetrations lightly, leaving drainage routes open. Do not bury the cable under sharp metal edges.

Step-by-Step Guide to Mounting the Light Securely

What Is Solar Flood Light Installation on Concrete Walls?

Mounting a solar flood light on concrete requires more than making two holes. Begin by choosing a wall section with clear sunlight, ideally for most of the day. Avoid areas shaded by trees, balconies, or nearby equipment. Hold the mounting bracket against the wall, then mark each hole with a pencil. Check the bracket with a spirit level. A slightly crooked light can spread illumination unevenly.

Wear eye protection before drilling. Use a masonry bit that matches the recommended anchor size, and keep the drill perpendicular to the wall. Remove dust from each hole with a brush or hand pump. Dust weakens the grip. Insert weather-resistant concrete anchors, then secure the bracket with corrosion-resistant screws. Tighten them firmly, but do not crush the bracket. That mistake is easy to make.

Attach the light and adjust its angle toward the target area. Position the solar panel separately if its design allows it. Keep the panel clear of direct shadows. Seal around exposed fixing points with an outdoor-rated sealant, especially on walls facing heavy rain. Test the light after sunset by walking through the sensor zone. Make small angle adjustments. The most attractive position may not provide the best sunlight. If the wall surface is cracked or hollow, stop and choose a stronger mounting location. A secure installation matters more than a perfectly centered appearance.

Safety Checks and Maintenance After Installation

What Is Solar Flood Light Installation on Concrete Walls?

A solar flood light on a concrete wall needs more than strong anchors. Safety checks begin after installation. Inspect each anchor for movement, especially after heavy rain or strong wind. The housing should sit flat, without a visible gap behind its mounting plate. A small gap can collect water and weaken the wall surface over time.

Follow NFPA 70 guidance and local electrical requirements when routing outdoor cables, even with low-voltage systems. Keep wires away from sharp concrete edges and protect entry points with suitable weatherproof seals. Check the solar panel for cracks, loose brackets, and shading from new branches. The U.S. Department of Energy reports that LED lighting uses at least 75% less energy and can last up to 25 times longer than incandescent lighting. That benefit still depends on clean optics and a healthy battery.

Maintenance should be practical and scheduled. Wipe dust from the panel and lens with a soft, damp cloth every few months. Do not use abrasive cleaners. Test the light after dusk, then check motion detection from several angles. Inspect battery swelling, corrosion, or unusual heat. Stop using the unit if these appear. IEC 60529 provides the framework for IP protection ratings, but an IP rating is not permanent after damaged seals or careless drilling. One common mistake is trusting the rating too much. Concrete dust, winter freezing, and repeated vibration can change real-world performance. Recheck the mounting points annually. 

Solar Flood Light Installation on Concrete Walls: Safety Checks and Maintenance

The chart shows practical inspection intervals in months for common components after installation. Check mounting hardware, wiring seals, the solar panel, and light operation more frequently in areas with heavy rain, dust, vibration, or coastal corrosion. Always follow the equipment instructions and local electrical safety requirements.

FAQS

What does solar flood light installation on a concrete wall involve?

It means securing a solar flood light to masonry with anchors and corrosion-resistant screws. The panel stores sunlight during the day. The battery powers the light after dark. The system may include a motion sensor and connecting cable.

Where should the solar panel and light be positioned?

Place the panel where it receives strong daylight for most of the day. Keep it away from balconies, trees, roof edges, and deep shadows. Aim the light toward entrances, driveways, or narrow paths. Avoid shining it directly into nearby windows.

Which tools and materials are useful for this installation?

Prepare a tape measure, pencil, spirit level, hammer drill, masonry bits, and safety glasses. A dust mask helps during concrete drilling. Use suitable concrete anchors, washers, cable clips, and outdoor-rated sealant. The fasteners must match the wall thickness and light weight.

How should concrete be checked before drilling?

Inspect the surface for cracks, loose render, hidden pipes, and possible water paths. Mark the mounting holes carefully. Drill slowly, then remove dust from each hole. Do not guess where pipes may run.

How can the light and panel be mounted securely?

Hold the bracket level before tightening the screws. Use enough cable length for gentle movement, without hanging loops. Protect wires from sharp concrete edges. Seal exposed openings lightly, but keep drainage routes open.

Why might the first installation layout perform poorly?

Shadows can reduce charging more than expected, especially in late afternoon. A motion sensor may react to pets, passing cars, or warm walls. Test the light for several nights before making final adjustments. My first layout might still be wrong.

What safety checks are needed after installation?

Inspect the anchors after heavy rain or strong wind. The mounting plate should sit flat against the wall. Look for movement, gaps, loose brackets, damaged cables, or water entry. Small gaps matter.

How should a solar flood light be maintained?

Wipe the panel and lens with a soft, damp cloth every few months. Avoid abrasive cleaners. Test motion detection from several directions after dusk. Check the battery for swelling, corrosion, or unusual heat. Stop using the unit if these problems appear.

Conclusion

Solar flood light installation on concrete walls is a practical way to improve outdoor visibility without connecting to a traditional power supply. These lights use solar panels to collect sunlight during the day, store energy in an internal battery, and power the LED light after dark. Because concrete is hard and dense, secure mounting requires suitable anchors, screws, a drill, and basic measuring tools. Before starting, choose a location with sufficient sunlight and position the light to cover the desired area.

The installation process involves marking the mounting holes, drilling carefully, inserting wall anchors, and tightening the fixture so it remains stable. Understanding how to install solar flood lights on a concrete wall also means checking the panel angle, motion sensor range, and light direction. After installation, inspect the mounting points, test the light at night, clean the solar panel regularly, and check for loose hardware or weather-related damage to maintain reliable performance.

Mason

Mason

Mason is a seasoned marketing professional with a deep expertise in the company's offerings and a passion for driving brand awareness. With a strong background in digital marketing strategies, he has an innate ability to connect with diverse audiences and effectively communicate product benefits.......